When I first picked up the Impossible Project I-1 camera on the day of release, I would have never thought I ended up being nocturnal and spending several late evenings in the first week of ownership hanging about on roads watching cars, buses and lorries flying by. I am however, jumping the gun here.
(Disclaimer, this is NOT my review of the I-1, I will take my time to test the camera properly in all its varying aspects before I write my full review.)
I already own a couple of SLR680s, a couple of Spectras and a boxy 636 Closeup, so aside from the missing SX-70, I have a choice of different cameras to shoot different things. Having different camera also allows me to load different films without having to do the fiddly mid-way cartridge swap trick. The cameras all do certain things better than others. For example, if I want to shoot double/multiple exposures, then the Spectra would be the only real choice (I’m no fan of the fiddly methods to get it working on the 600 cameras) and if I wanted manual control and depth of field, then only the SLR680 will do (yes I know, once again Im missing the SX-70 here).
However, one thing Polaroid cameras have never been great at, in my opinion was controlled low light photography. Sure the likes of the Spectra Pro and the Mint SLR670M have allowed shutter speed control, but it was set at the default aperture of F8 (on the SLR670M) or F10 (on the Spectra Pro), meaning I was restricted by the aperture.
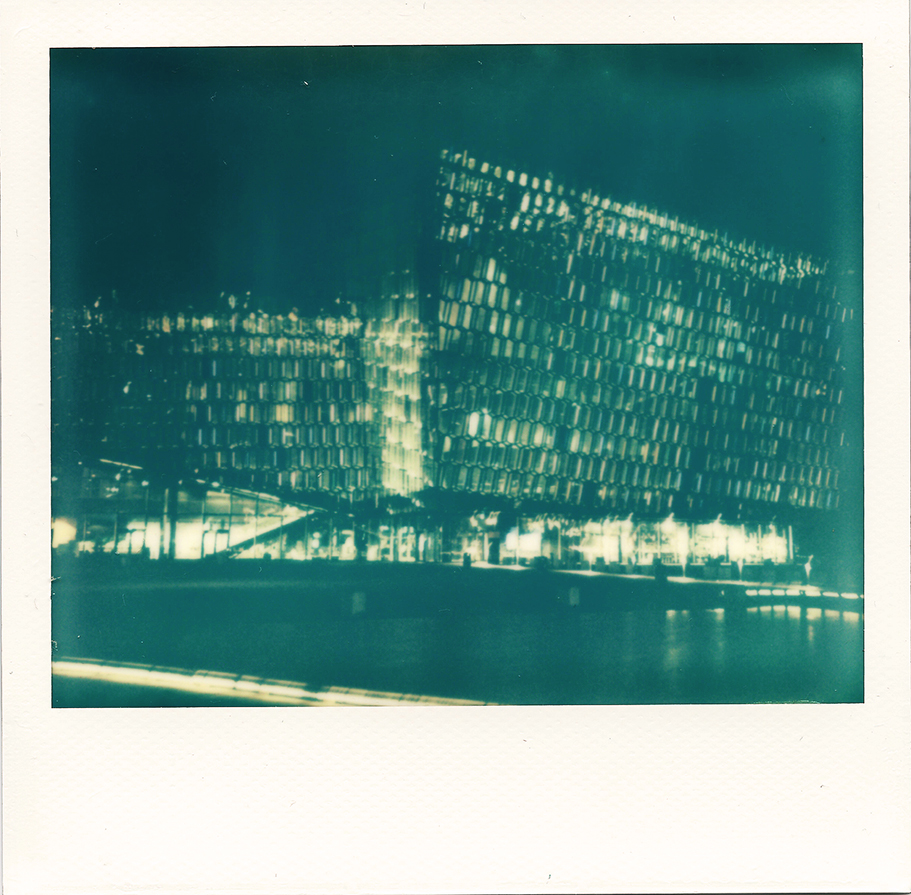
A while back when I was in Iceland I took the following shot of the Harpa Concert Hall building on the Spectra Pro. I used a DSLR to match the F10 aperture and ISO 640, and then played about with how many seconds I needed to keep the shutter open. On the DSLR it was 10 seconds, so I matched this on the Spectra Pro and the result was as followed. Granted, it was a really cold night when I took this shot in November 2014, hence the blueness (Polaroid still develops awfully in extreme cold conditions) but I was still left underwealmed by the detail. The Harpa building, for those that know is a spectacular array of different colours shimmering in the dark bleak skies of Reykjavik.
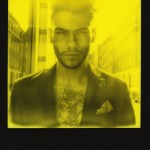
So back to the I-1. Having used it in camera only mode during the first day, doing some test portraits with my long time model collaborator, Mimi C and some random shots at the I-1 launch party here in London, I was a little underwealmed by the camera-only mode (except for the fact that double exposures were now a doddle, and even simpler than the Spectra method). It just seemed like an old boxy 600 camera and there wasn’t much in terms of control on the camera itself, nothing of which my existing Polaroid cameras can not already do. I have reservations about the viewfinder, auto focusing and a few other niggly bits, but more on those in the full review coming soon.
Then I got the app installed on a spare unused iPhone 5C lying about (the Android app was not launched yet at time of writing), and that’s when the I-1 all changed for me. Using the app opens up a whole host of goodies. There are different modes, mostly useful, some a little gimmicky, but the most important is the manual mode.
Aside from ISO which is stuck at ISO 640 due to the film, the manual mode allows you to change shutter speed, distance (which in turns changes which of the 5 lens the I-1 uses), flash output power and aperture. Step back for a moment, and read that last bit. Yes, aperture! Proper full manual mode. The I-1’s highest aperture is F10 (equivalent of the Spectra) but think about the other direction, and it goes all the way down to F64! Something not available on most DSLRs I have used. Why would you want to use such a small aperture I hear you ask? The answer is why I am writing this blog post. For me, my natural starting point for testing out the manual capabilities was low light night time photography.
A couple of days after I bought the I-1, after a couple of drinks I attempted to take a light trail at Tower Bridge. I had read that F12 and a shutter speed of 10-20 seconds was a good start for light trails. However if you read the first sentence of this paragraph properly, you probably read the bit about me having a few drinks, so along with my Chinese enzymes (that’s what I always blame) causing me to be a little bit tipsy, and the fact I had only one shot of colour left in my camera, the end result came out disastrous and horribly overexposed.

Why did this happen? Because online articles always tell you to shoot the lowest ISO possible and in the case of digital camera, that’s usually 100 or 200. In the case of the I-1, using the 600 film, the ISO is 640, so quite some way off ISO 100, therefore more light was let in, hence the overexposure. Not helped either by the exposure being 20 seconds!
Over the first weekend with the I-1, I re-attempted the light trails after some thinking (or maths if you will) about the settings. In all honesty, I could have got out my DSLR and experimented matching similar ISO to the I-1 and I-Type, but for some reason I just wanted to experiment and do trial and error. (Obviously with Polaroid film being expensive, I would suggest to use a DSLR or a compact with manual settings to get the settings right and then mirror the I-1 to match. I know it takes the fun out of the shot a little, but if you are shooting night time photography, there is some science behind it.)
All the settings are easily manageable in the Manual Mode in the app, with 4 distinct areas. The top for setting the lens, the left for setting the Aperture, right for Shutter speed, and the middle is to set the flash output, and finally the remote trigger at the bottom of the screen.
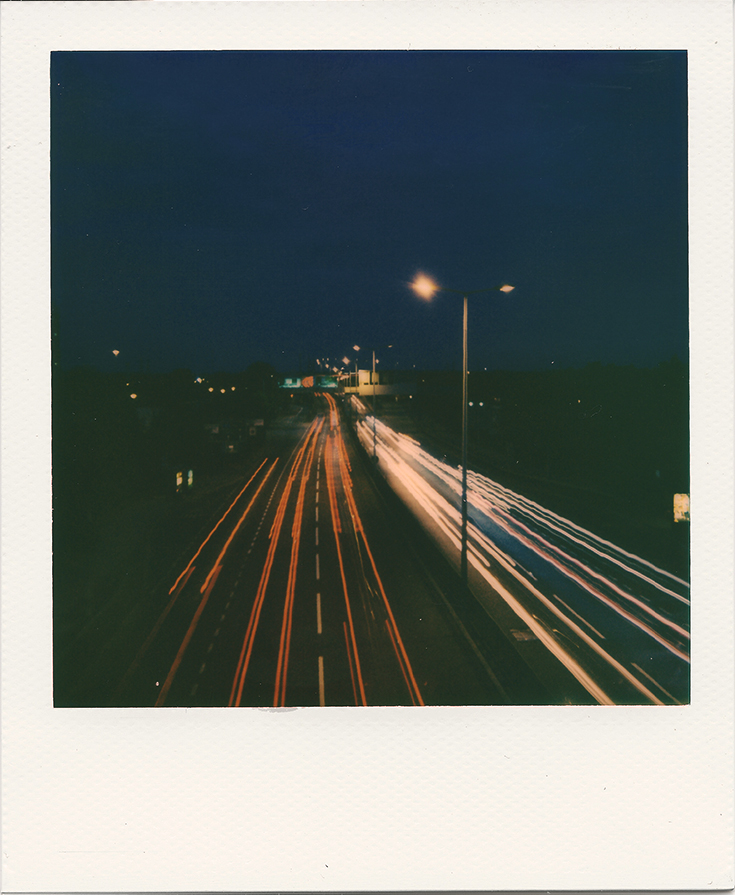
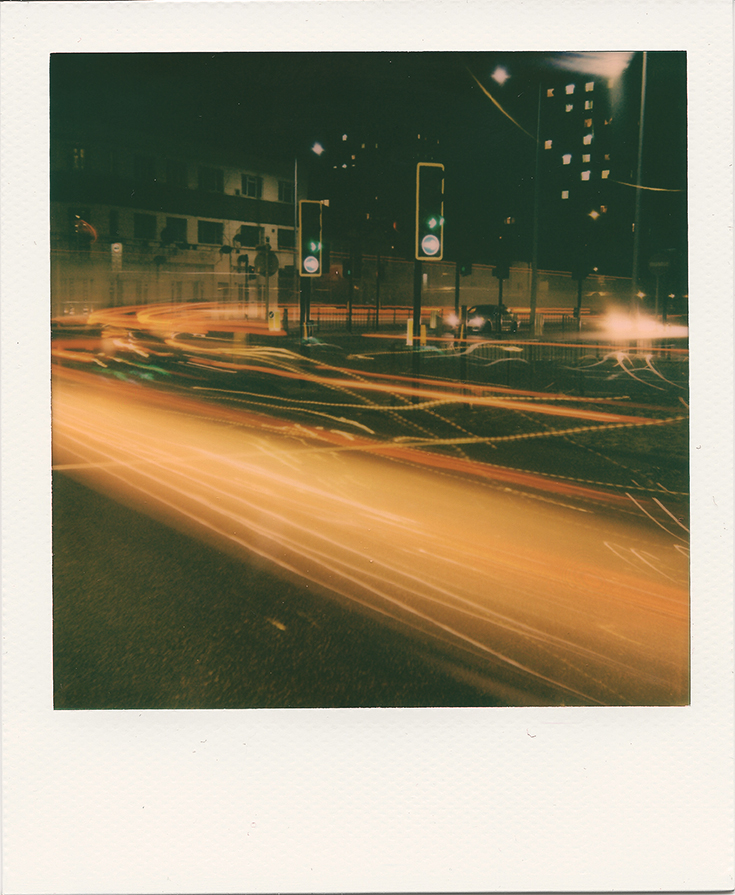
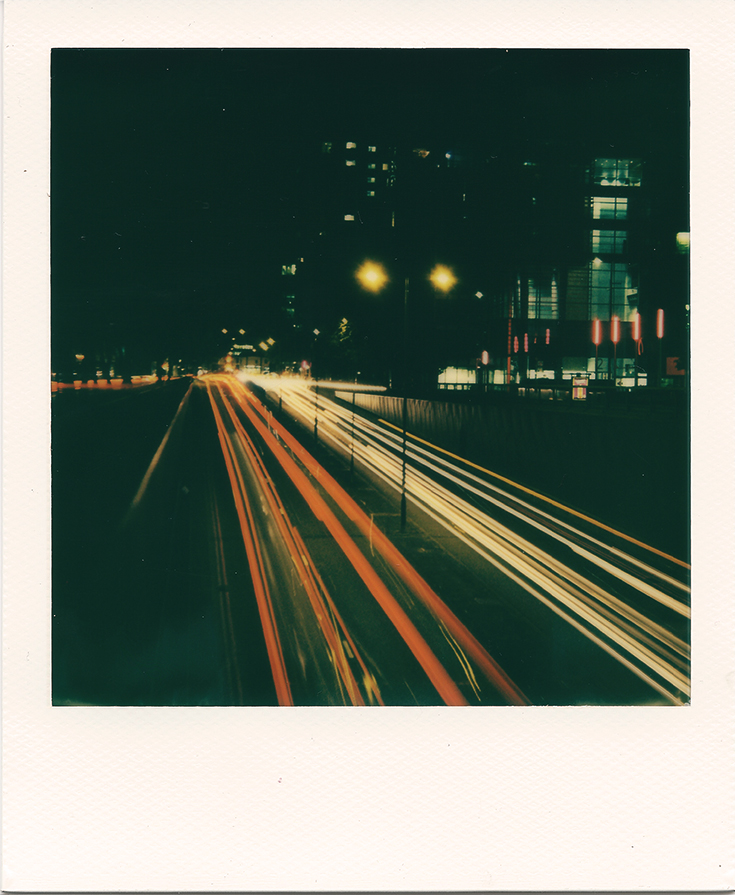
I started off nearby home using the North Circular (A406) as my starting point, looking for a public footbridge I could use to set up my Manfrotto tripod and mounting my I-1 on it. (A tripod or steady surface is a must for light trails.) I decided to set the aperture smaller by quite a few stops down from the the F12 I had attempted before. Compensating for ISO 640, I decided that F22 (roughly half) would be a good start. As there was still a little light left in the twilight sky, I decided for a shorter exposure, setting it to 4 seconds. I set the lens to the 3.5m to infinity setting. The following was my first successful light trail on the I-1.
The new I-Type film using the latest gen 3 formula shows an emergence of an image within a few minutes, which given the nature of these shots, gives me a fighting chance of at least seeing if I got the shot right. If I was using the older film, I feel the old waiting time of over 10 minutes to see the emergence would have put me off.
I have seen light trails done before on Polaroid (and Im not for one minute saying I came up with the idea) I know you can control Shutter speed with the likes of the SLR670M from Mint, the Polaroid Spectra Pro and by using various tricks on the SX-70 and SLR680, but the it was stuck at the native aperture set on the camera, usually F8 or F10, or whatever the electronic eye decided. The difference in being able to dial down to F22, meant that I could expose more for the light trails, whilst keeping the rest of the scene dark.
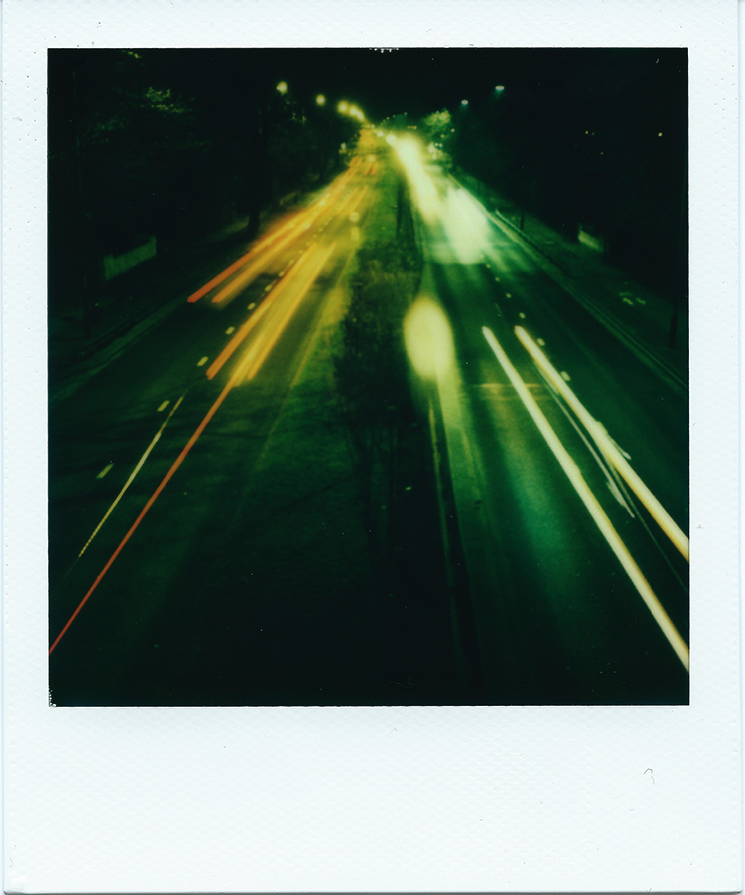
For comparison, this was a light trail shot I attempted with my SLR680, about a year ago on Gen 2 600 film (it was a test batch, hence the green hue), on a steady surface, and without any trickery, leaving the camera to work it out.
The night got darker, and twilight had gone, so I stayed at F22, but experimented with shutter speed, ranging from 6-10 seconds. Obviously it depends on how much other light is available in the scene, so if you are just trying to capture just light trails in a very dark scene, you can use F22 and anything above 6 seconds to about 20 seconds to emphasis the light trails, but the longer you let the shutter open, the more light it will let into the shot. If there are any ambient lighting in the scene, you have to be aware of them and compensate, otherwise the longer you leave the shutter open, the more than become more prominent.
The app allows for the shutter to open up to 30 seconds, but it would have been great to have a bulb mode too.
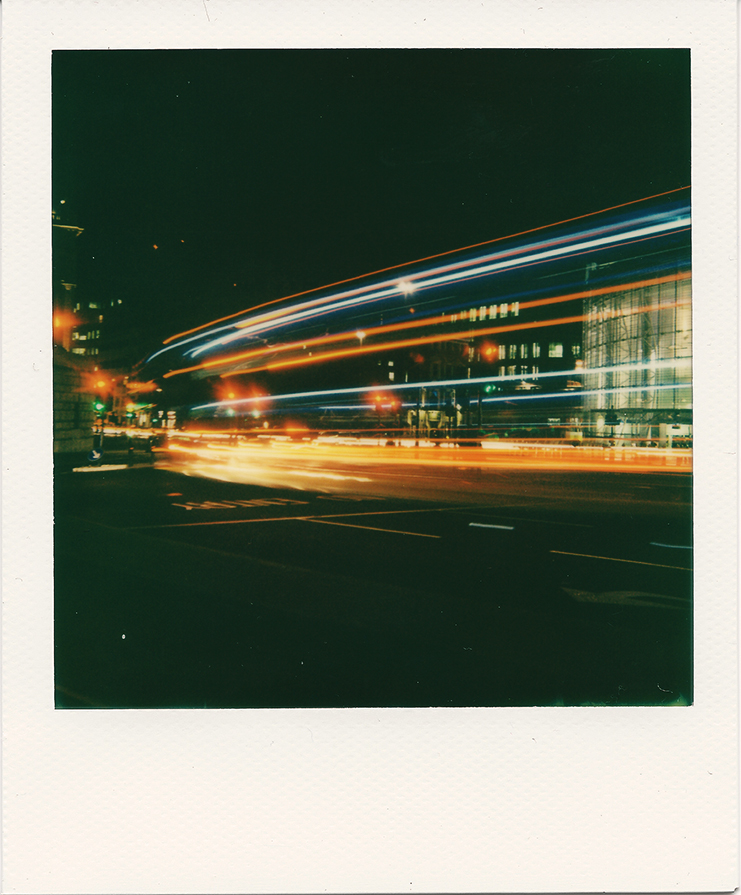
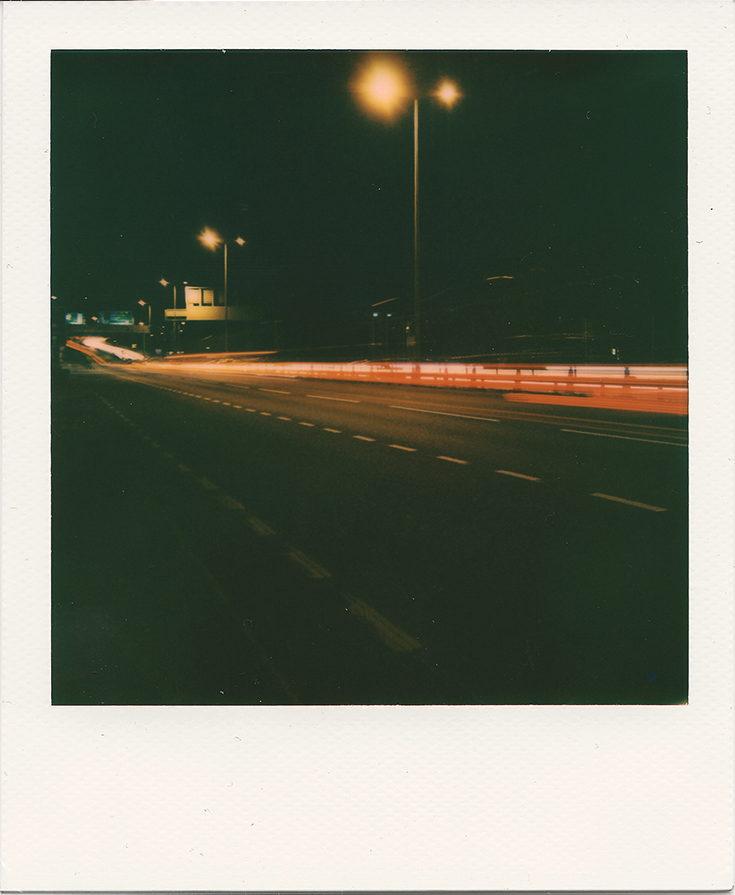
The following was at 8 seconds, which was probably not enough, I should have left it open for longer to allow more traffic through and longer light trails. However, how many vehicles going through the scene also affects the end shot, so timing is also of the essence.

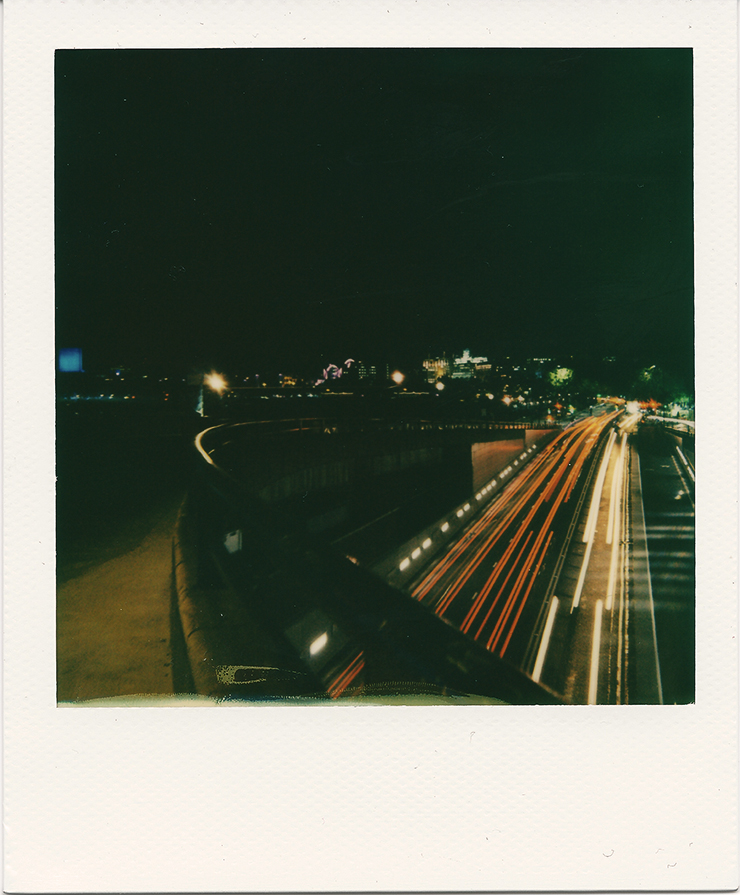
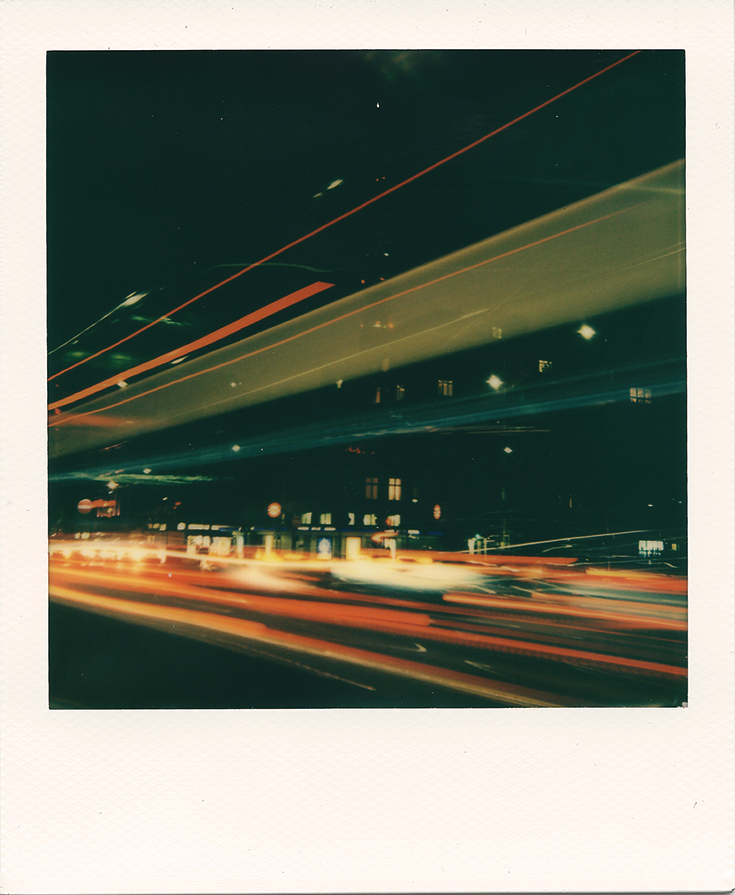
This was at 6 seconds as I was aware of the light in the scene so did not want to overexpose the rest of the scene. When I finally saw the results, I was smiling at what was now possible with the I-1 and the manual mode, and my imagination ran wild.

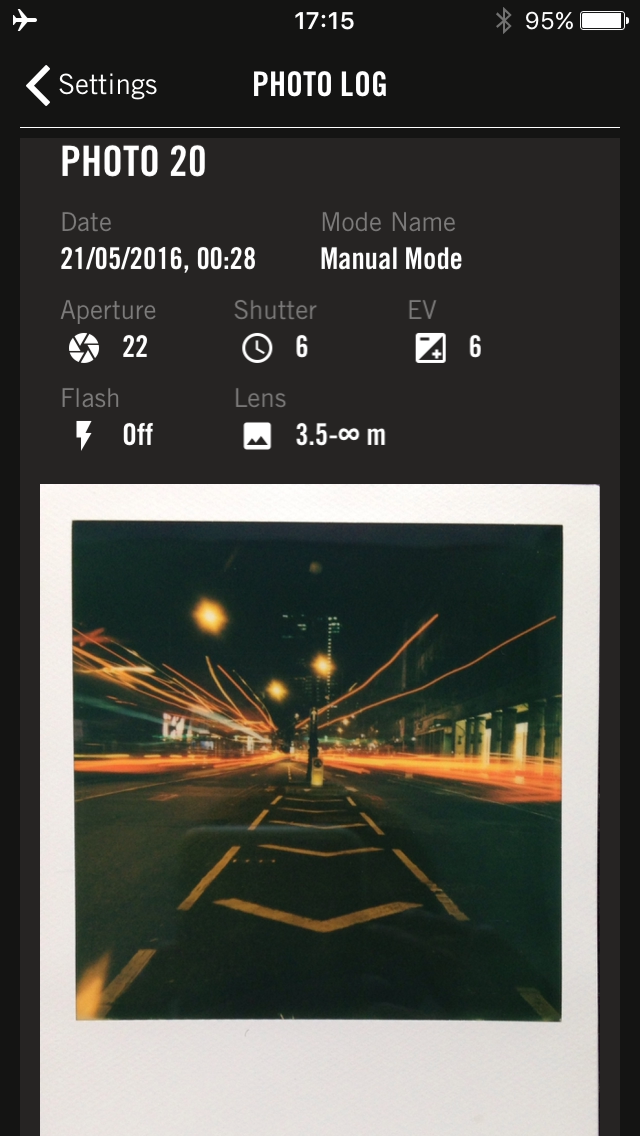
A great feature about pairing the camera to the app is that it records the settings for any photographs taken using the Manual Mode (I think It allows for it in any of the modes but I can’t be sure as I’ve not used them much). The logs then allow you to scan (take a photo) from your iPhone and attach it to the shot, which is really handy as a reference guide and documenting your shots. I only wish that this was possible when using the camera in camera only mode, so to see what the camera is automatically doing in terms of settings.
So after 3 shots of light trails, I was truly hooked. Throughout the following week, I would wait til twilight and then go hunting light trails. I started at Blackfriars, but by now, I was looking for shapes; shapes in how the traffic flowed. I was no longer just interested in straight line light trails, I was looking for bends.
I felt it was time to return to Tower Bridge minus alcohol consumption, to re-attempt the shot I tried half a week earlier. Having learnt that F22 and 4 to 8 seconds would be my default settings for light trails, I was careful about the lighting, as I knew there was more ambient lighting around Tower Bridge. However, as a test, I decided to leave it at these settings to see what I would get, knowing full well the end result may have been overexposed. The following was that result.
Surprisingly, not overexposed, but I felt something was missing. I had already done quite a few light trails from the side of the road, and I felt it was time to do something else. It was time to get in the midst of it, lights either side of me.
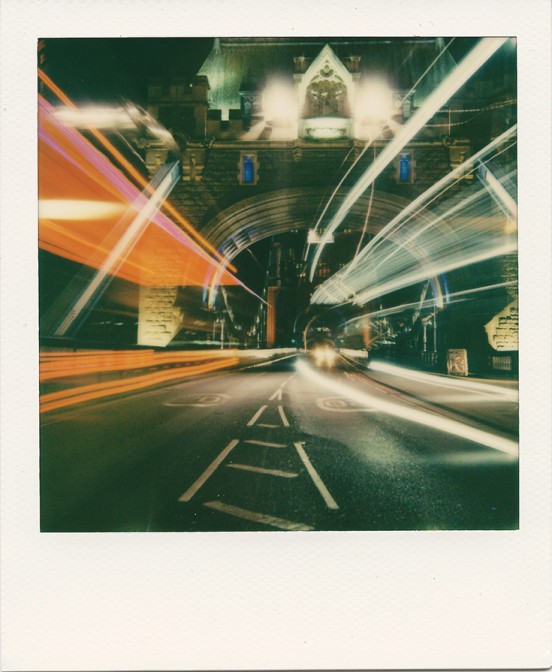
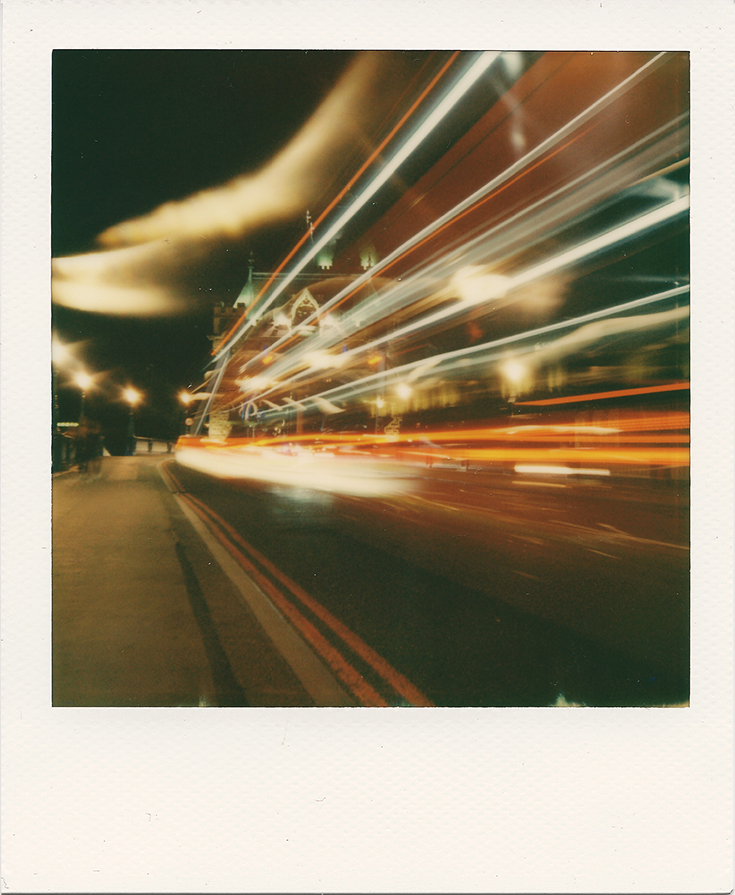
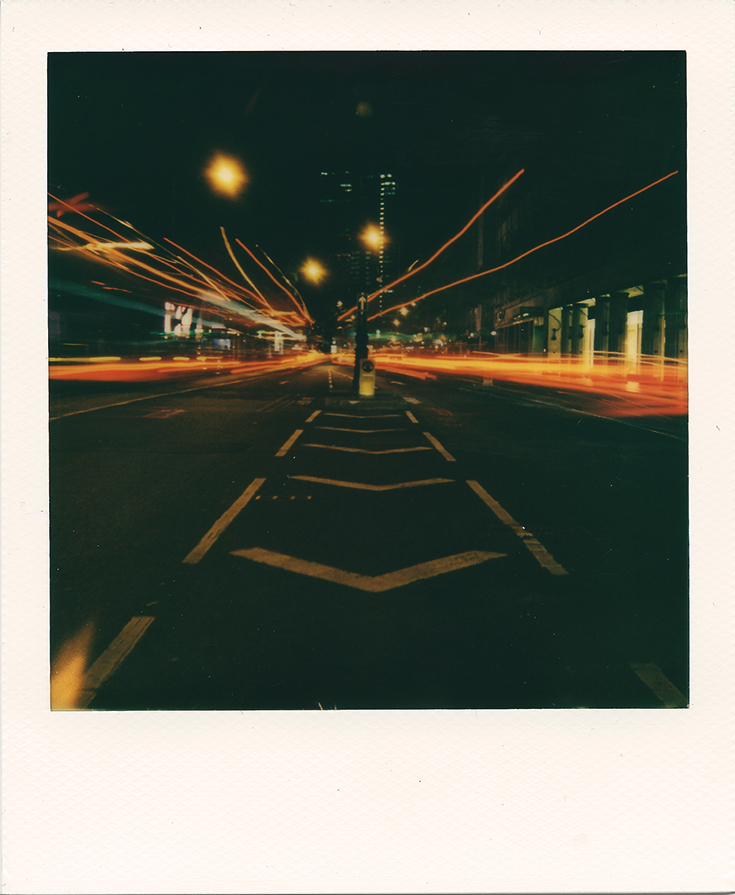
Luckily for me, as you reach the bridge itself, there was a pedestrian island in the middle of the road. It was time to set up my tripod. The I-1 was ready and the settings were set on the app, but then came the wait. Part of the fun about light trails is waiting for that right moment. I already knew what car lights look like but I wanted something with more impact and naturally what would have more impact than 2 buses/lorries (with tail lights at the top and bottom) going pass me either side in unison. It took a few minutes but then I noticed a funky disco bus lit up like Las Vegas coming in direction and another bus coming in the opposite side. It was now or never.
I took the shot, and hoped for the best but what emerged from my pocket a few minutes later was something a bit different, something I had seen very little (if any at all) in all the Polaroids I have come across before. I believed I had just shot something a little bit special, smiled and proceeded to take the last train home.

When I posted it on social media over the next few days following, I would have never imagined the response I got for the photo. Without doubt, whether it was on Instagram, Twitter or Facebook, it was my most received photo of all time and I was taken back from all the positive response.
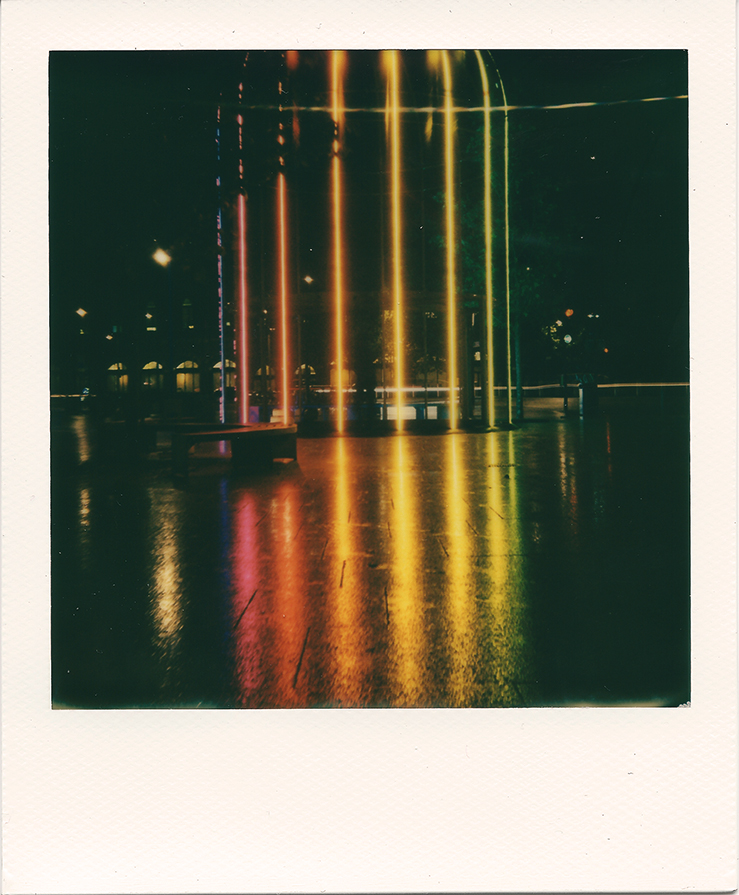
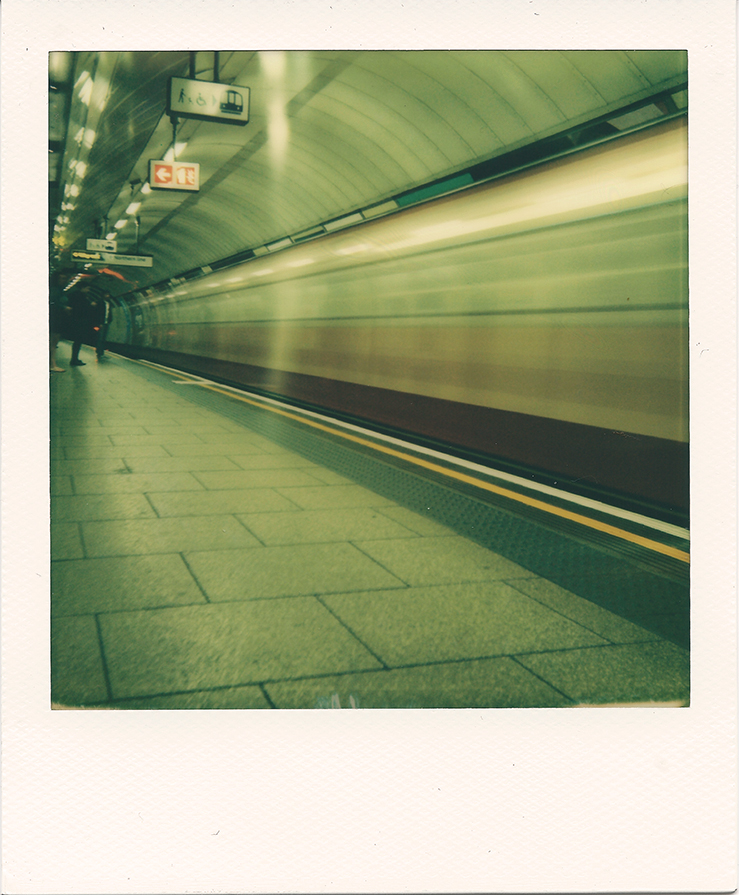
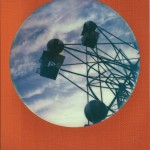
Not one for sitting on my laurels, I’ve been still going out at nights to play more with light trails, each time experimenting a little different in terms of settings and movement. Naturally this progressed to shooting trains moving on the platforms of the London Underground, but I’ve not quite mastered the metering of this yet (you can tell be the shot in the gallery below). With the Aperture control, you can also set it to a small aperture and expose for longer allowing for sharp details in night shots too, as shown in my image of the Identified Flying Object (aka neon birdcage).
So my head is now full of ideas for the I-1, ranging from wanting to shoot light trails in other big cities like Hong Kong and New York, to shooting lights at the local fairground. Im also hoping to mix it up a bit and start playing with in-camera composites too (my inspirations from film posters).
For all the reservations I have about the Impossible I-1 at this stage (and there are quite a few), I can’t deny the endless creative opportunities that the manual mode allows. I’ve only touched the surface by shooting light trails and a few night shots, but there are so many creative opportunities I’ve yet to explore and will be exploring. I know I this isn’t the final review of the camera, but the manual mode does really elevate the camera.
My only hope is that Impossible addresses some of the other niggly bits on the I-1, hopefully through firmware and I look forward to the app finally reaching us Android fans. Also it’ll be great for Impossible to develop a small box that can be attached to the camera to allow for all this goodness without the extra hassle of carrying around a smartphone. Fingers crossed.
Hope you enjoy the rest of the gallery and many thanks for reading!


Nate Johansen
3rd June 2016 — 7:03 am
Light trails are the bee’s knees! Great progress on these shots.